

We all loved the sitcom F.R.I.E.N.D.S, didn’t we..? I loved it too! If you loved it (as you just said) let me ask you something… “Do you remember the peephole door frame Monica had in her apartment?” . If you are a guy you ‘might have’ (as men never notice things like that) and if you are a girl you ‘must have’ (because we notice EVERYTHING!). Yes exactly… this one!!
 I accidently stumbled across a tutorial for this frame on Pinterest (Click here for the tutorial). And it took me a spilt second to decide that I wanted to have one for my apartment too.. There are two reasons behind that..
- I love the show! and still can watch it again and again.. AND
- My bestie always compares me to Monica Geller Bing!
Can you believe that??!!? Well, if you can .. you probably know me well 😀 I have some (NOT ALL- I repeat – NOT ALL) of her crazy qualities like being a cleanliness freak (thats my mum’s gene) with an obsessive-compulsive nature (that’s my dad’s gene and that’s what makes me try my best) and I won’t call myself a chef but yeah I can cook too (thanks again to my mum’s recipes). One more thing that I have in common with her is that my hair does not like humidity as well! ( Not too happy with this gene though 😦 )

You can stop laughing now! Lets get to work! I had a lot of fun making this frame. I wasn’t too sure and confident at first but it turned out pretty okay! Here is how I did it.
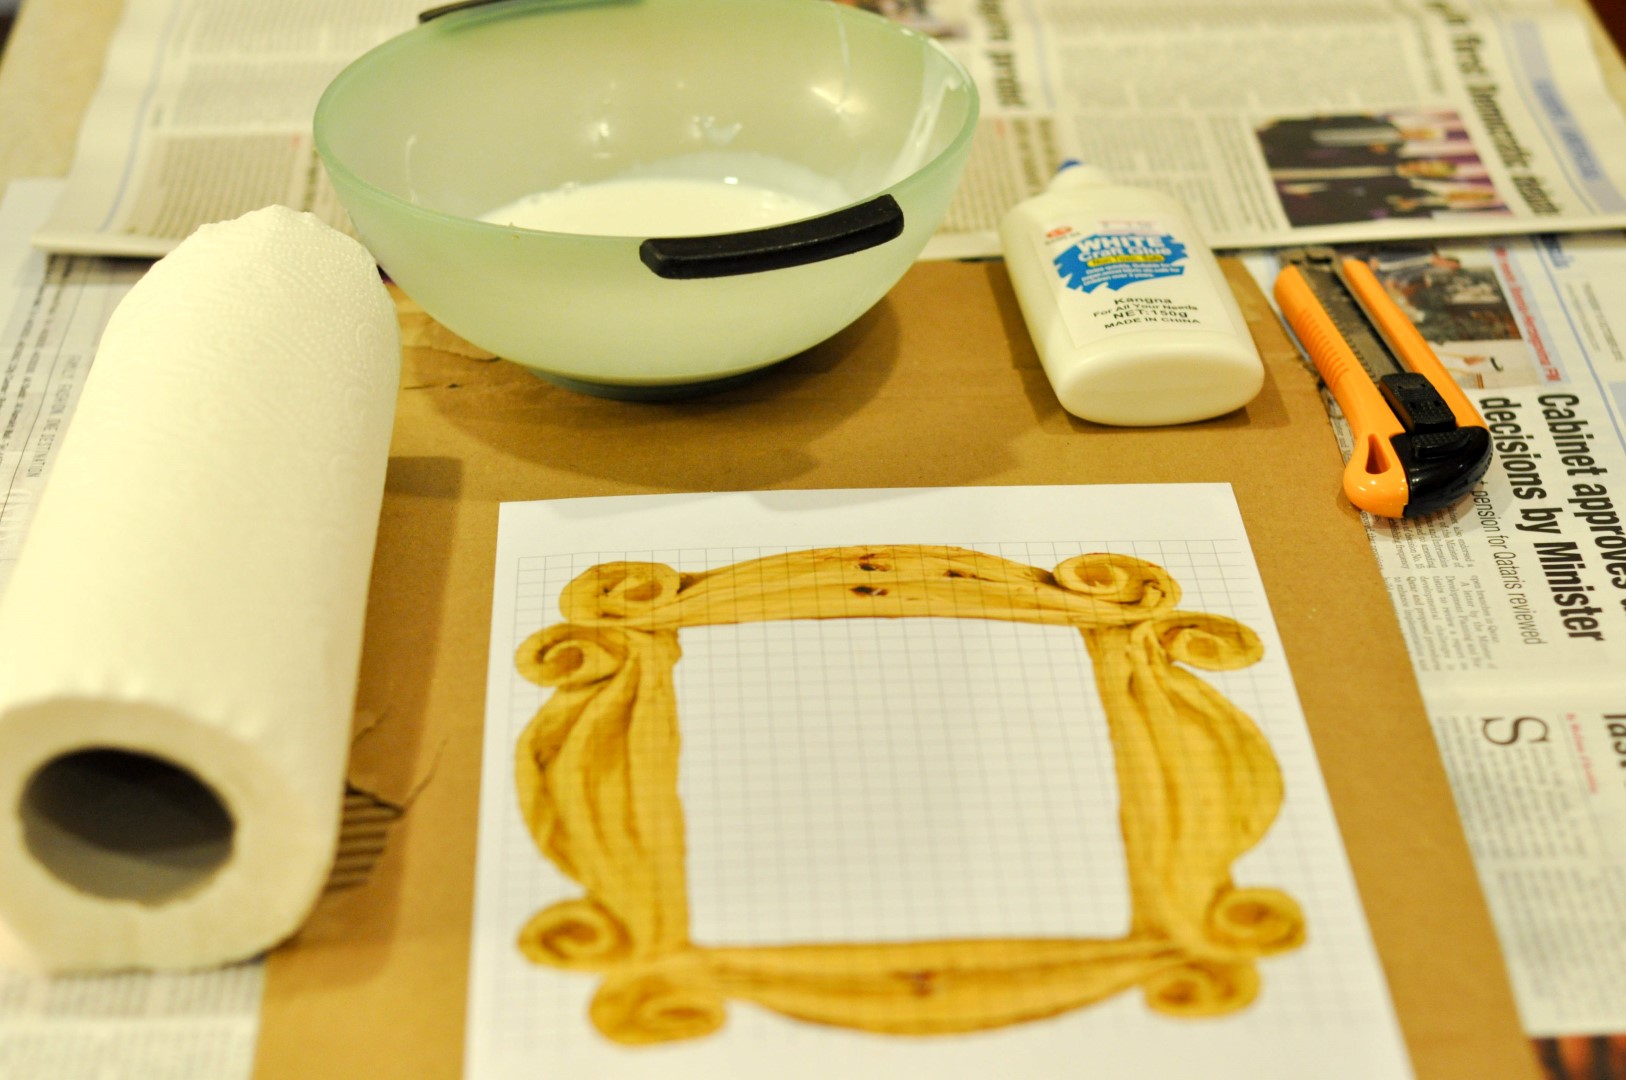
- I mixed 3 parts of glue and 1 part of water to make the paste for paper mache.
- Next I printed out the template of the frame from Instructables.com and pasted it on a thin card board.
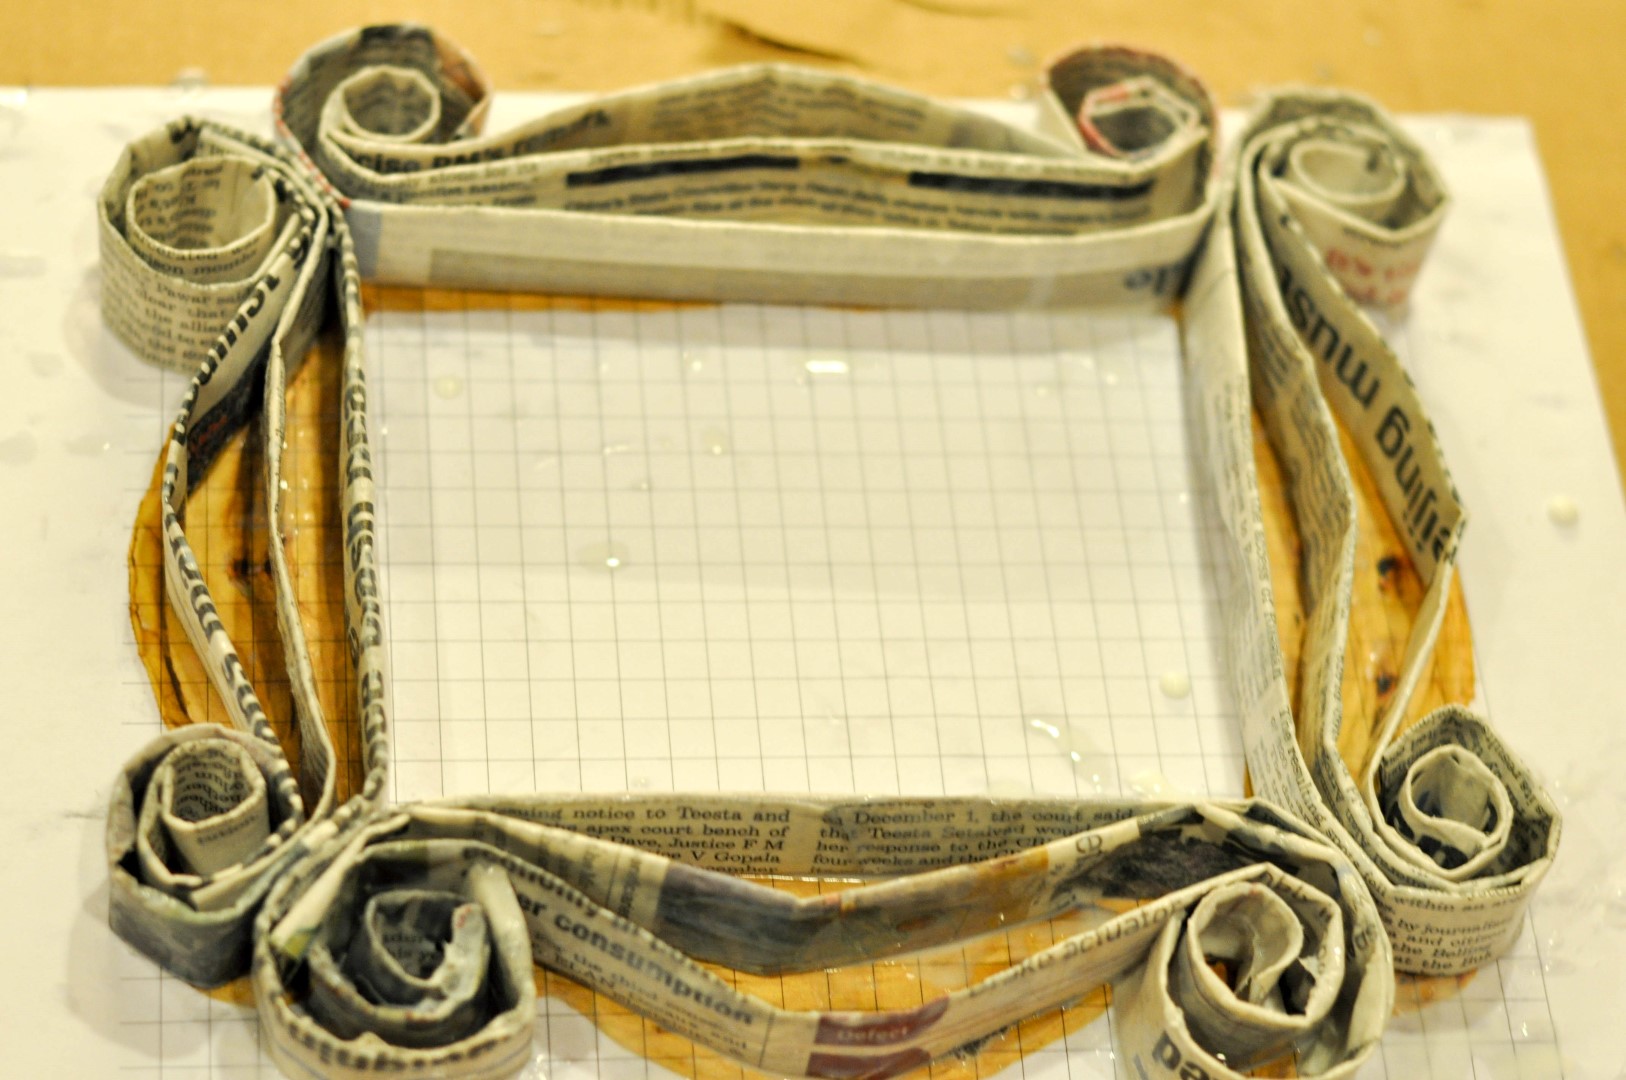
3. I then took an old news paper and rolled them up (12 rolls – with 6-7 folds each) , dipped in the glue mixture and then followed the pattern and pasted them on the template. (I used 3 rolls on each side of the frame.) Let it dry completely. I left it for a couple of hours to dry. TIP: Do all the rolling of the newspaper before u start pasting and dipping your fingers in glue.( I learned it the hard way).
- Paper Mache Process

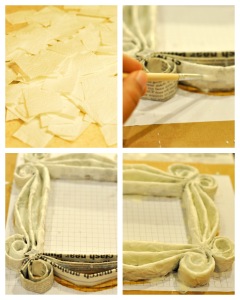
4. In the mean while, I cut up pieces of the paper towel and as soon as the new paper was dry I started the doing paper mache. TIP: Be Patient: Its a very slow and tedious process!
5. I did 2 coats of it and then let it dry over night.

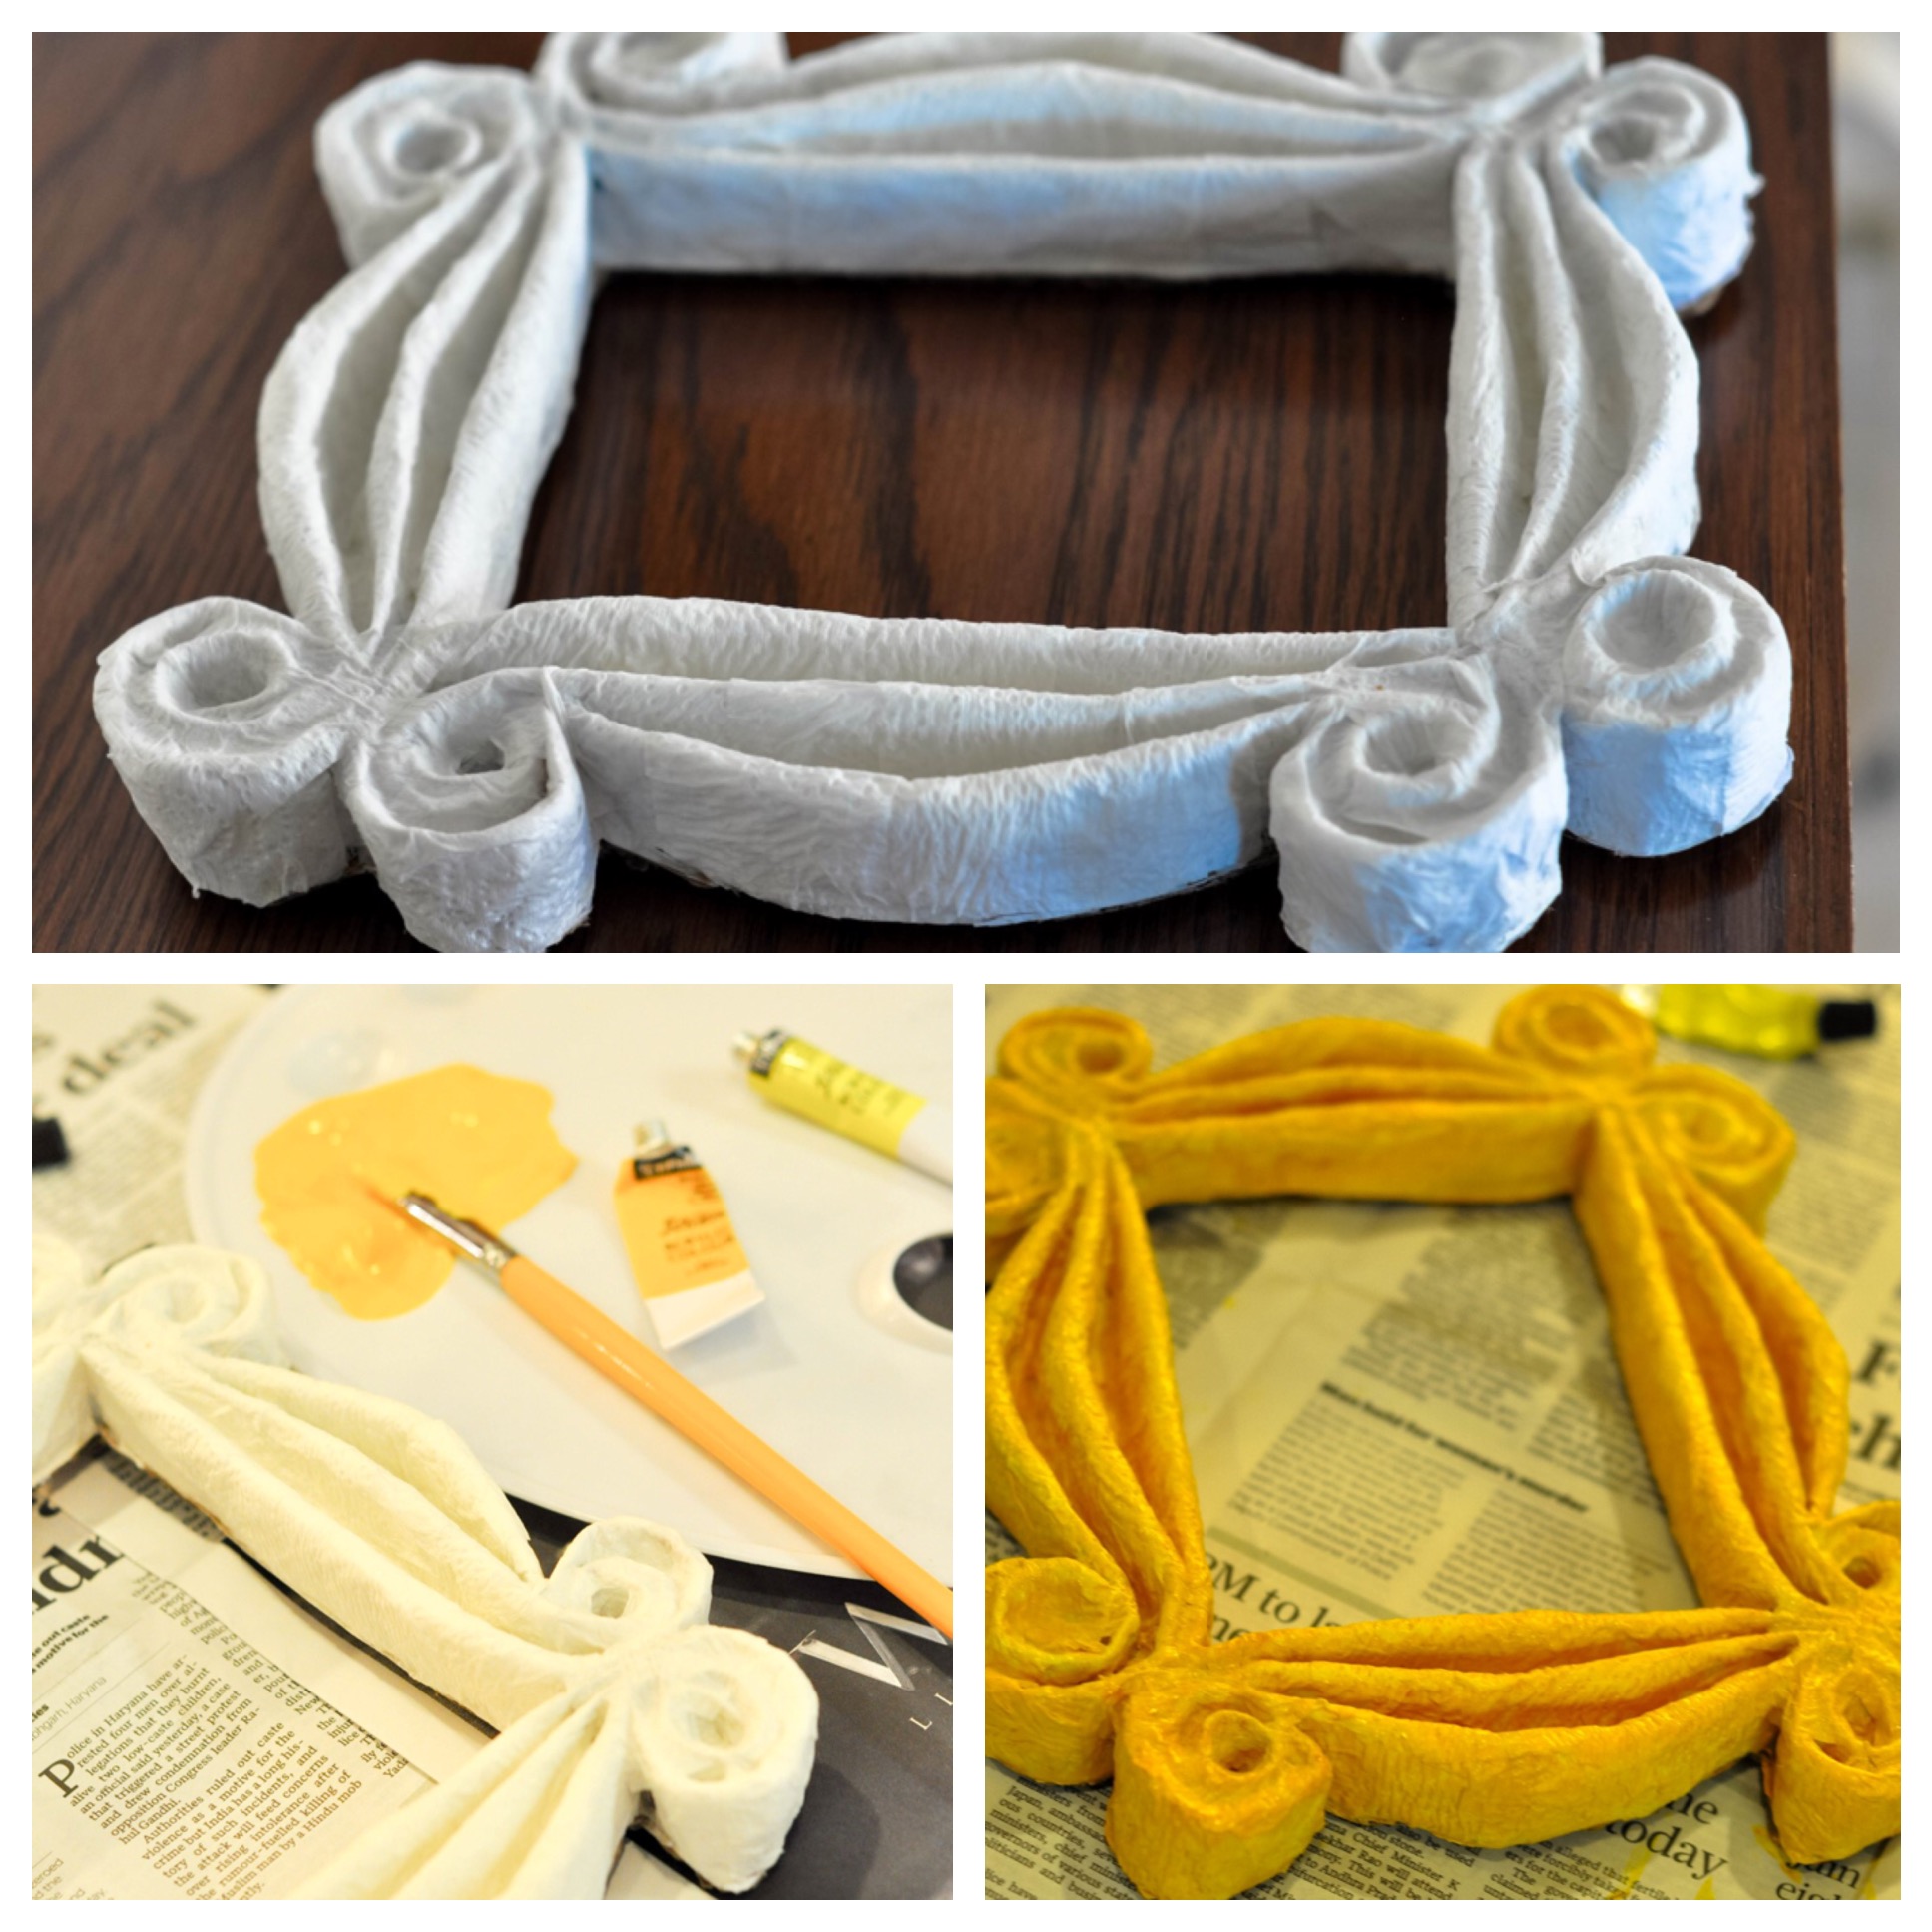 6. It looked a little ‘not too strong’ for my liking so I did another coat of mache and let it dry again. I picked my self a book and forgot about everything! (What made me forget about this… read here ).
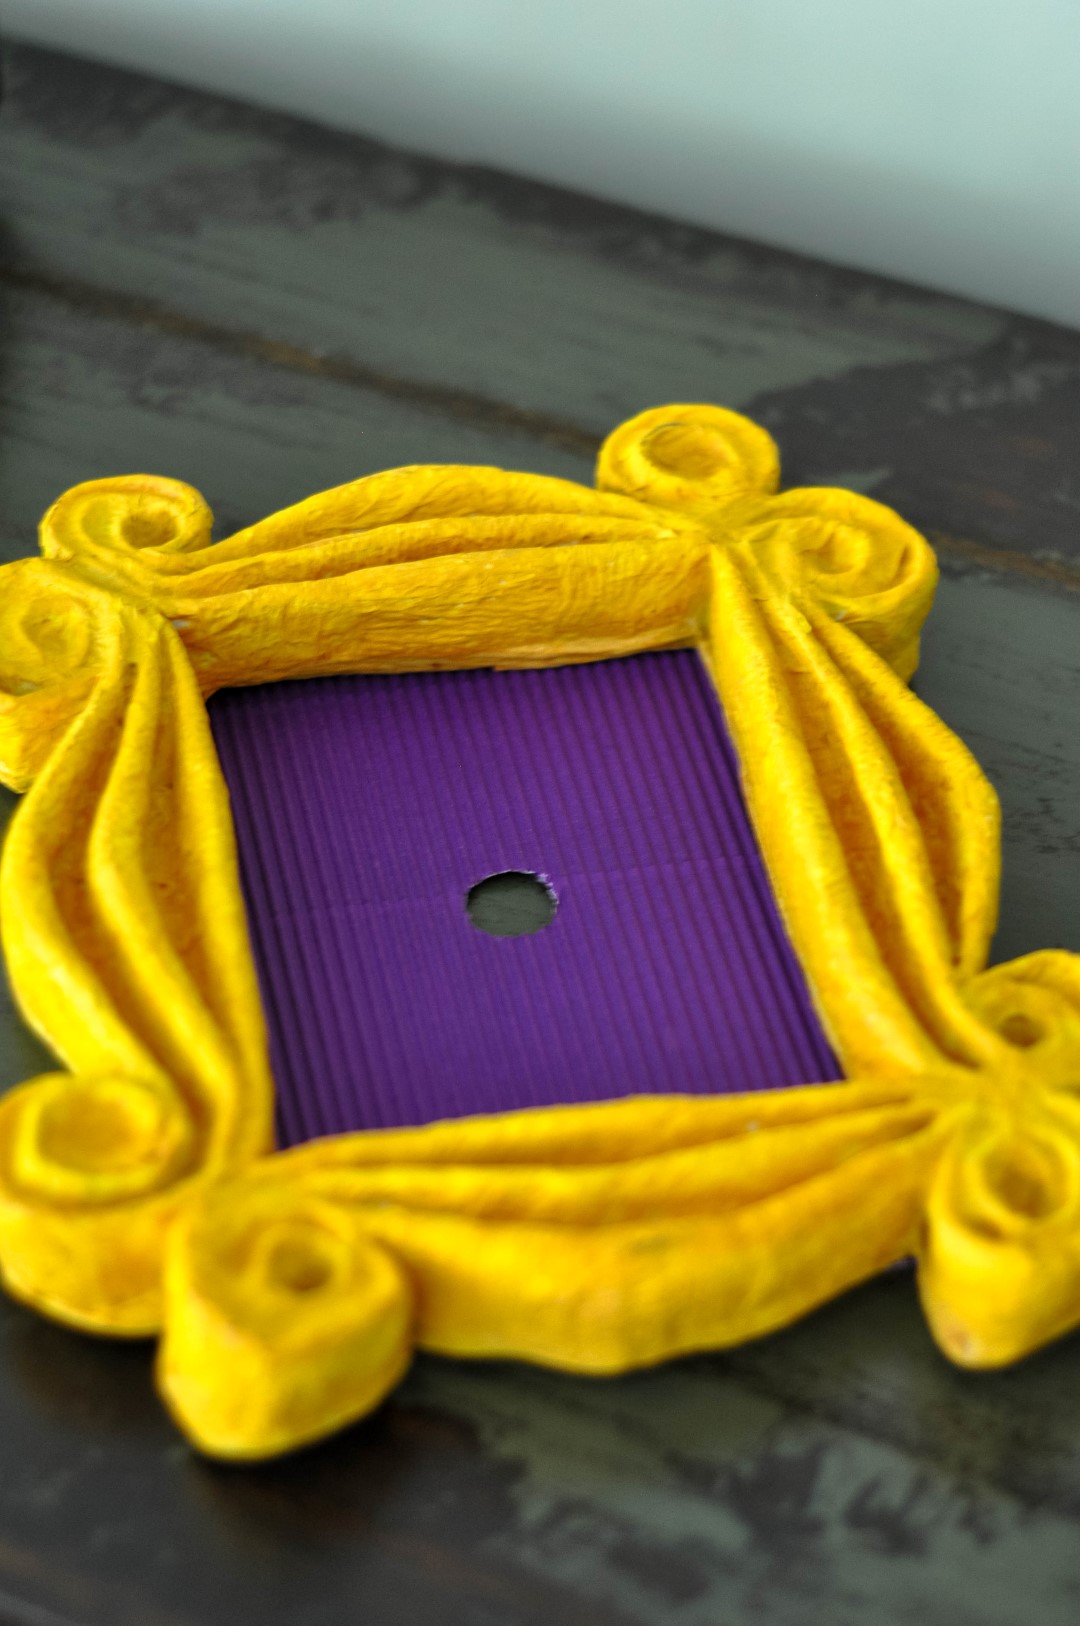
7. Once I was happy with the firmness of the frame, I cut it off from the board and painted it in two shades of yellow (I used Acrylic Paints).
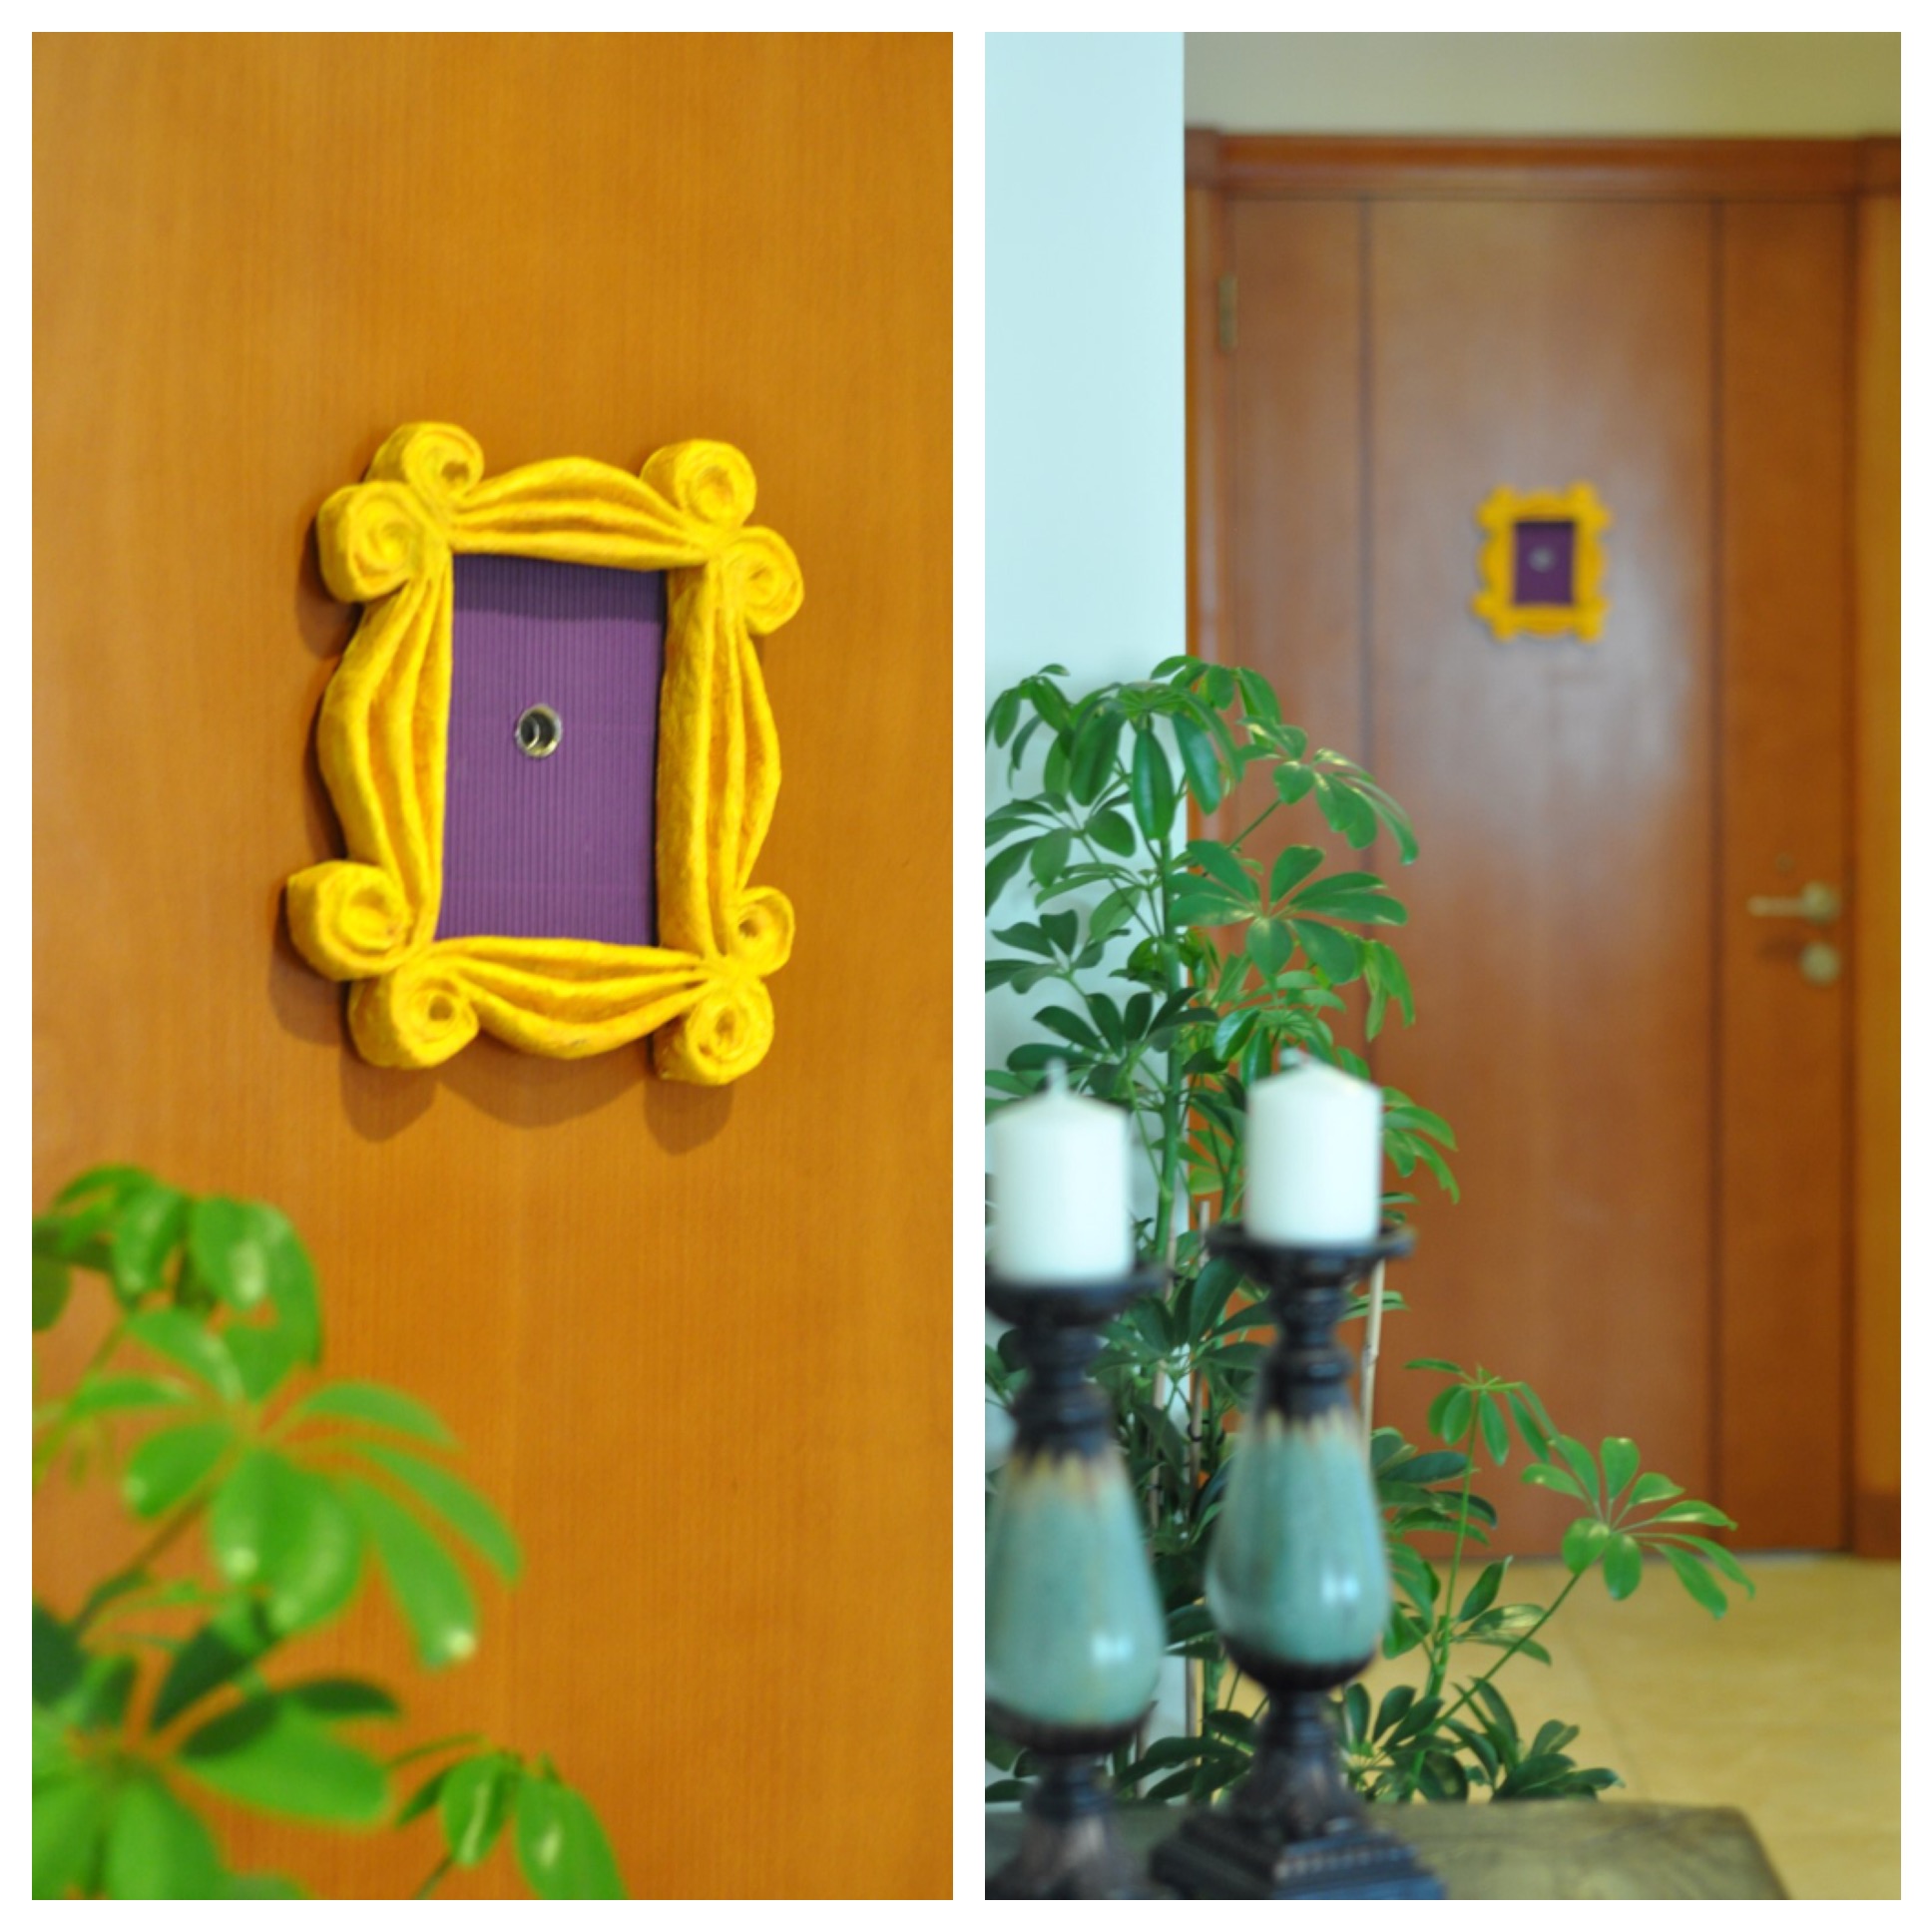
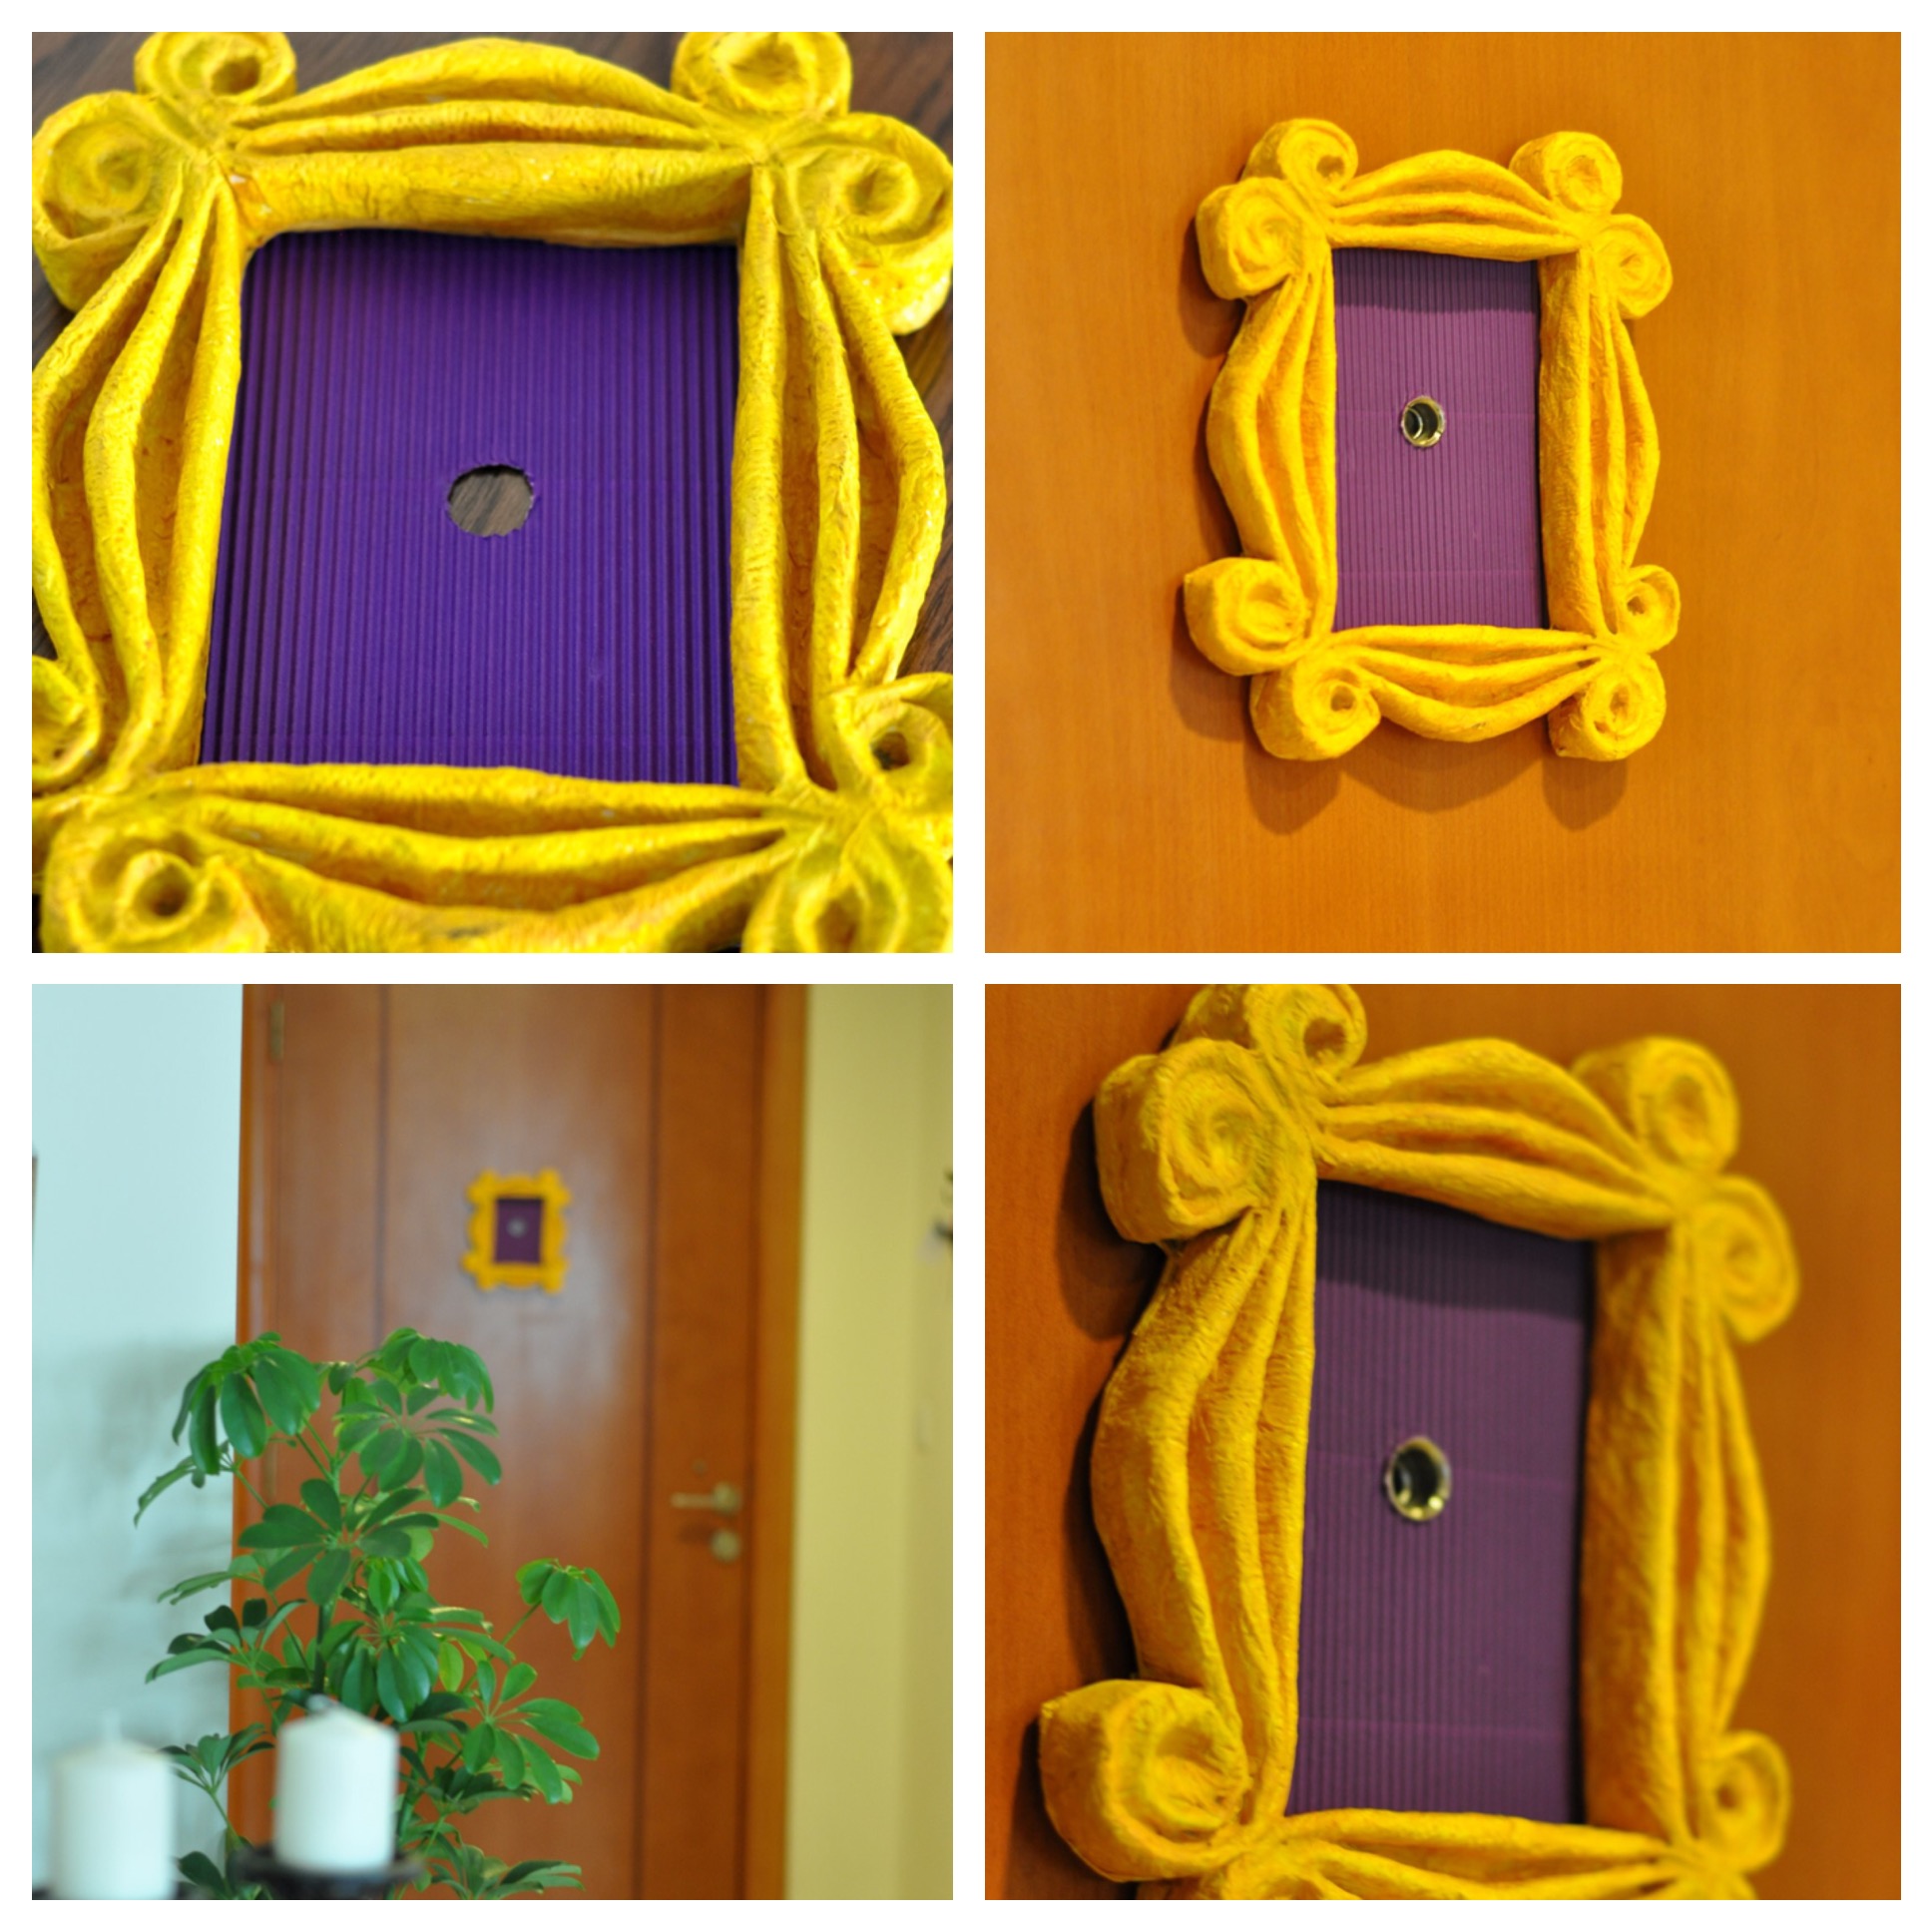
8. I then cut up a purple paper about the size of the frame and cut a hole in the middle of it and pasted it to the frame. Though the tutorial didn’t ask for it, I wanted it to have a bit of purple (as Monica’s door was purple and THAT my husband would not approve of at all! ). I used Velcro double sided tape to mount it on the door. TADAAAAAA!!!

and you know what F.R.I.E.N.D.S, I am Loving it! (FACT: I don’t eat Mcdonald’s as much as I use their tag line :p )
This would make an awesome gift for a friend. You can also put a picture of you and your friend or use one of the famous lines from the show. I have made a couple of them which you can download and use for free!
Hope you enjoyed this project as much as I did ( a little less is fine too 😉 ) Let me know what you guys think!! And share your images if you try making it.
Until next time…. ciao!

I salute you! 😂 Mahaan hain aap 😄
LikeLike
Pingback: Guess What?? — The Blog Is One Month Old Today! | Diary of a PMP mom
Hello, do you remember what the exact shades of the acrylic paint you used to paint this were? I would really like to know!!
LikeLike
I unfortunately don’t. I mixed up colors to get the shade that seemed right to me 🙂
LikeLike
Pingback: 16 Amazing Things to Create with Paper Mache - Ritely
Thank you soooo much for this! I’m currently making mine right now- thanks for your wonderful directions- they were PERFECT!!
LikeLike
I am so glad it turned out good for you! Thank you for letting me know. 🙂 would love to see a picture of your frame
LikeLike
Super excited I found your tutorial…I graduate in about a week and a half from my university, and I wanted to decorate my cap with the frame, but wasn’t sure how, until I saw this. It seems simple enough, and I’m excited. Thank you!
LikeLike
How exciting! Congratulations! Would love to see a pic of how it turns out
LikeLike
Hi there! This looks amazing!! I’m planning on making one for a FRIENDS theme housewarming and I have a few questions.
Is the template meant to be A4?
Also, how much glue did you need? Is 100ml enough?
LikeLike
Pingback: My DIY Paper Mache Frame – Gathering Memories by Liz
This is so great! I’m planning on making one for my FRIENDS themed housewarming next month.
I have a few questions though:
Is the template meant to be A4 once it’s printed?
Also, how much glue did you need? Is 100ml enough?
LikeLike